
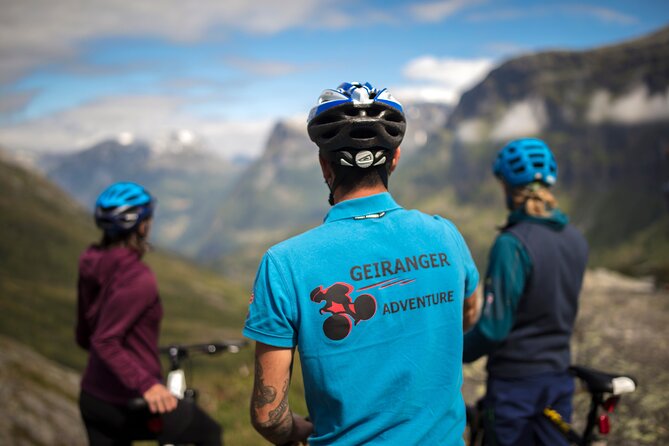
Reviewed · CYCLING TOURS
Geiranger: Sky to Fjord Downhill Biking Adventure
The best part of this Geiranger excursion is simple: you start beside Djupvatn Lake at 1,030 meters and coast toward the fjord on one of Norway’s most scenic roads. Along the 16-kilometer route, you can stop at waterfalls, valleys, mountain viewpoints, and Flydalsjuvet, the famous gorge above Geiranger.
I like the freedom of riding at your own pace, and I like that the air-conditioned vehicle handles the uphill transfer. The small maximum group of six also keeps the start from feeling crowded. The main drawback is important: there is no guide riding with you, and the road is shared with buses and other traffic.
Key points to know before you book
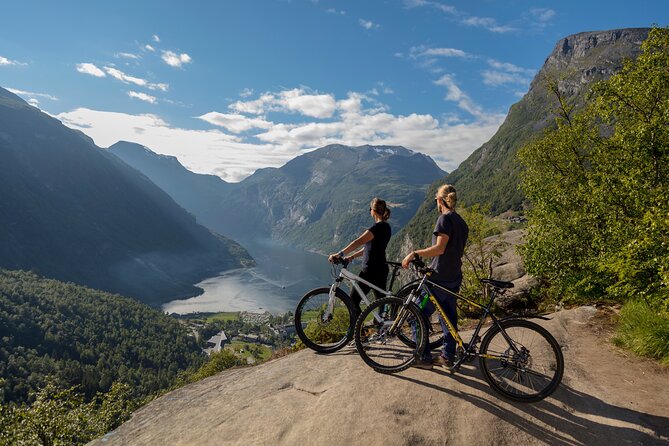
- Start high above Geiranger: A vehicle takes you to Djupvatn Lake, 1,030 meters above sea level, before the ride begins.
- Ride 16 kilometers downhill: Most of the route is a gentle coast, though one short uphill section may require extra effort or walking.
- Stop for Norway’s best views: Look for Blåfjell, Kvandalls waterfall, Opplenskedalen Valley, Knuten, and Flydalsjuvet.
- You ride without a guide: You receive instructions and route advice at the top, then continue independently.
- Equipment is supplied: The package includes a bike, helmet, gloves, and visibility vest, though equipment quality may vary.
- Plan for traffic and weather: The road has no dedicated bike path in the section described, and the activity depends on good weather.
Starting at Djupvatn Lake, 1,030 meters up
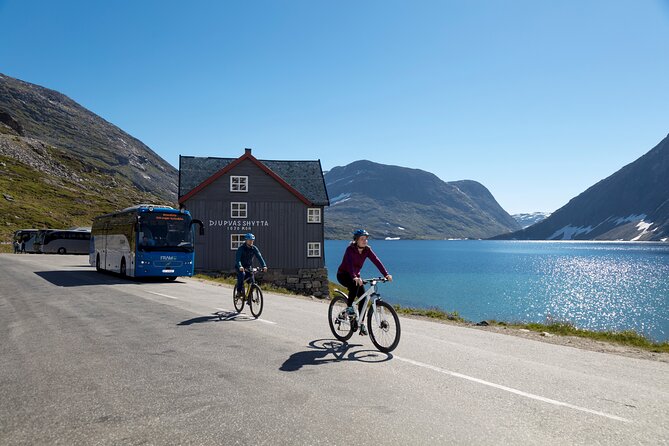
You meet at Geirangervegen 10 in Geiranger. From there, an air-conditioned vehicle carries you uphill to Djupvatn Lake, where the ride starts. The transfer matters because it saves you from climbing the same road you are about to ride down.
At the top, the team provides a bicycle, helmet, gloves, and visibility vest. You also receive technical and safety instructions, plus advice on how to handle the descent. Take a few minutes to set your seat and check the brakes before leaving. That small pause can make the rest of the ride much more comfortable.
The experience lasts about two and a half hours, including the drive up and the downhill route. The group limit is six people, which should allow for a fairly quick equipment handout and less waiting than you might face with a large shore excursion.
The ride is unguided. This is not a follow-the-leader cycling tour, and no guide accompanies you down the road. You choose when to stop, how long to take at each viewpoint, and how quickly to continue.
That freedom is a real advantage if you want time for photos. It also means you need to pay attention to signs, traffic, your own braking, and the route ahead.
A few more Andalsnes half-days to weigh up
- Geiranger Shore Excursion: Mt. Dalsnibba and Eagle Road
★ 4.5 · 718 reviews - Geiranger: RIB Fjordsafari Geirangefjord
★ 4.5 · 651 reviews - From Ålesund: Trollstigen Sightseeing Village & Fjord Tour
★ 4.4 · 651 reviews
A mostly easy coast, with one short climb
The route covers 16 kilometers, or nearly 10 miles. Much of it is downhill, so you can expect a relaxed ride rather than a hard training session. A rider in their late 60s described being able to handle the route easily, and another account called it a gentle coast downhill.
Still, do not mistake downhill for effortless. You need enough control to brake on descents, steer confidently, and stay alert around vehicles. The road is not described as having a shoulder or separate cycle path. One rider chose not to continue after seeing large buses using the same road.
That point deserves attention. The scenery may pull your eyes toward the fjord, but you must keep your attention on the road. Give buses and other vehicles plenty of room, and stop only where it is safe. If you are nervous around traffic, this may not be the right cycling excursion for you.
There is also a short uphill section. It is minor, but you may need to pedal for a while or walk the bike. The rest of the route is mainly downhill, so this brief effort should not define the ride.
The best approach is to ride slowly enough to enjoy the scenery. You are not racing anyone. The route rewards frequent pauses, and the experience is better when you allow time for photographs instead of rushing straight to the village.
Blåfjell and the first mountain views
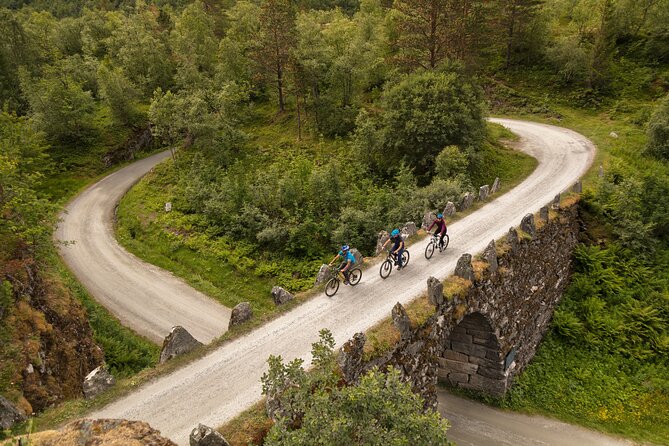
One of the early stops is the viewpoint at the foot of Blåfjell mountain. This is where the scale of the route begins to sink in. You are high above Geiranger, with mountain slopes, open valleys, and changing views as the road bends lower.
At this point, check your equipment again. Make sure the helmet sits firmly, the brakes respond properly, and the seat height feels right. Equipment concerns were a serious issue for one rider, who found a bike poorly adjusted, sticky brakes, worn tires, and a helmet that was difficult to fit.
That report does not match the experience described by several other riders, who found the bikes easy to handle and in good condition. Still, it gives you a useful practical lesson: inspect the bicycle before setting off and ask the staff to correct anything that feels wrong.
The supplied safety vest is meant to make you more visible on the road. Gloves add comfort and grip, especially during a long descent. These items are included in the price, but fit and condition are worth checking at the start.
Kvandalls waterfall and Opplenskedalen Valley
The route continues past Kvandalls waterfall and into the Opplenskedalen Valley. These stops break up the ride and give you a chance to look beyond the road itself.
Waterfalls are part of what makes this area so memorable. You may see water dropping from steep mountain slopes, with flowers and rural scenery along the road. The exact appearance depends on the season and the weather, but the route is designed around a series of viewpoints rather than one single photo stop.
Opplenskedalen gives you a broader view of the surrounding mountains. It is a good place to pause, breathe, and let faster riders move ahead. Since you are not tied to a guide’s pace, you can stay longer for pictures or continue when you are ready.
A few riders used the freedom of the route to make an additional stop for a hike to Storsaeterfossen Waterfall, leaving their bicycles at the start of the trail before continuing later. That option is not listed as a formal part of the experience, so do not count on it as a planned feature. It does show how the unguided format can give you room to make your own choices if timing allows.
More bike days around Andalsnes:
- E-bike and hike in Åndalsnes
★ 5.0 · 4 reviews - Andalsnes: Bike & Hike Adventure to Litlefjellet Summit
★ 5.0 · 3 reviews - Oslo: 3-Hour Highlights Bike Tour
★ 4.8 · 1,609 reviews - Oslo Highlights Bike Tour
★ 5.0 · 979 reviews
Knuten and the approach to Flydalsjuvet
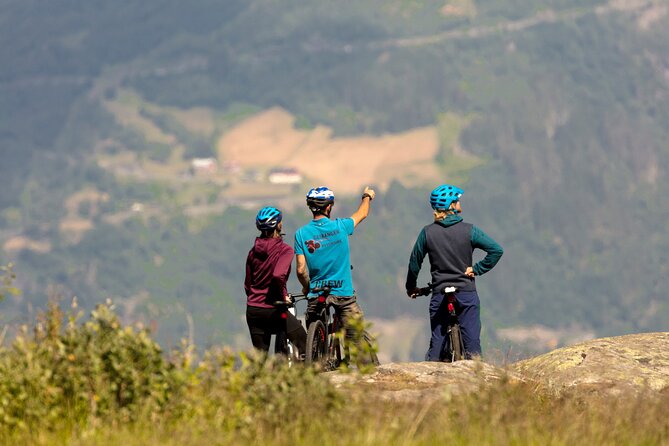
Knuten is another named point along the ride. The route keeps changing as you descend, so the views are not all the same. High mountain scenery gradually gives way to closer views of the fjord, valleys, and the road below.
The most famous stop is Flydalsjuvet. This dramatic gorge is one of the best-known viewpoints near Geiranger, and it gives the ride a strong finish. From here, you can look across the steep mountain setting and down toward the fjord area.
The itinerary specifically identifies Flydalsjuvet as the main stop, but you should think of the ride as a string of scenic pauses rather than a formal guided sightseeing program. You are not receiving a detailed talk at every location. The team provides information and safety advice before you leave, while the rest of the experience depends on your own pace and curiosity.
That distinction affects value. If you want a guide explaining every waterfall and mountain, choose a guided sightseeing trip instead. If you prefer to stop when you like and spend more time with the views that catch your eye, this format is a better match.
Traffic, safety, and the equipment question
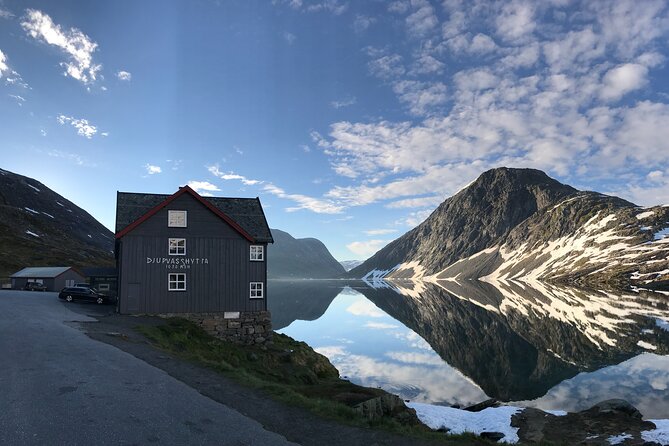
The biggest practical issue is the road itself. A rider described large buses passing close by and no shoulder or bicycle lane. Another rider found traffic accommodating, so conditions may feel manageable, but you should not book this expecting a closed road or a quiet cycle trail.
Your comfort level matters more than your cycling speed. You should be able to control a bicycle on a downhill road, brake early, and remain calm when vehicles approach. The activity asks for a moderate level of physical fitness, but road awareness is just as important as stamina.
The equipment list includes:
- Bicycle
- Helmet
- Bicycle gloves
- Visibility vest
The equipment feedback is mixed. Several riders praised the bikes and found them easy to manage. One detailed complaint described worn tires, sticky brakes, a loose kickstand, small helmets, and a damaged visibility vest. That is a serious concern, even if it was not the general experience described by other riders.
Ask for a properly sized bike before you leave. Check that the brake levers work smoothly and that the helmet strap adjusts securely. Also ask what to do in case of a puncture or mechanical problem. One rider had trouble getting a phone number for assistance and had no mobile service at the top, so it is sensible to save the provider’s contact details before leaving the meeting point.
The activity includes no repair service or guide on the road in the information provided. That makes a basic equipment check especially worthwhile.
What $160.09 buys you
The price is $160.09 per person. That is not a bargain if you measure the experience as a simple bicycle rental. You are not paying for a full guided tour, and the downhill ride itself is unguided.
The price makes more sense when you count the transfer to 1,030 meters, the supplied equipment, the small group size, and access to a route that would be difficult to arrange on your own during a short visit. For a cruise shore excursion, the convenience can be valuable. You arrive at the meeting point, ride in the provided vehicle, cycle downhill, and finish back at the starting point.
The return arrangement is also straightforward. The activity ends at the meeting point in Geiranger, so you do not need to arrange a separate pickup after the ride.
I would consider this good value for a confident cyclist who wants a scenic activity and appreciates independent time at the viewpoints. I would consider it expensive for someone who mainly wants a bus ride to photo stops, or for a rider who expects a guide, local storytelling, and maintained premium equipment.
The strong rating of 4.6 from 23 ratings suggests that the experience works very well for many people, but the smaller number of ratings and the sharply negative equipment report mean you should keep your expectations realistic.
Who will enjoy this Geiranger bike ride
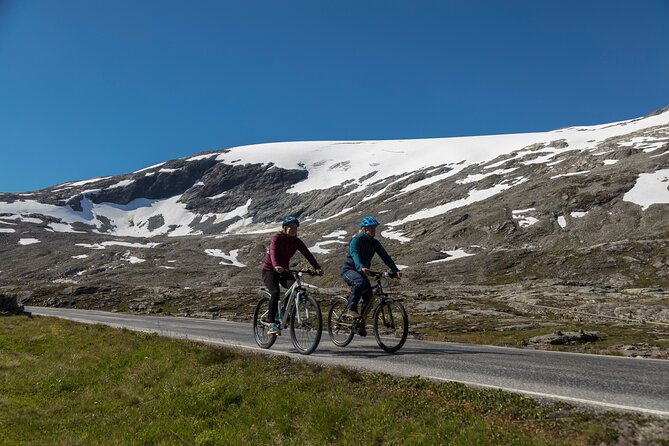
This excursion suits you best if you:
- Ride a bicycle comfortably on roads
- Like downhill cycling more than a formal guided tour
- Want time for photographs
- Can manage moderate physical activity
- Are comfortable sharing a road with buses and other vehicles
- Prefer a small group, with a maximum of six people
It can also suit older riders who are comfortable on a bicycle. Age alone is not the issue. Balance, braking, traffic awareness, and confidence matter more.
You may want to skip it if you dislike downhill riding, worry about narrow roads, or need a guide beside you throughout the route. It may also be a poor choice if you have limited time and cannot tolerate a weather-related change.
The experience requires good weather. If poor conditions force a cancellation, you can receive a different date or a full refund. You can also cancel for a full refund up to 24 hours before the start time. Changes or cancellations inside that 24-hour window are not accepted, and the amount paid is not refunded.
Small details that can improve the ride
Arrive ready to ride rather than treating this as a passive sightseeing trip. Wear clothing suited to changing mountain weather, though the supplied equipment details do not specify additional clothing. Bring a way to take photographs, but keep it secure while moving.
Use the first few minutes at Djupvatn to get your bearings. Ask where to go, confirm the route, and make sure the bike fits. Do not assume that a quick handoff means everything has been checked for you.
Plan to stop. The best value comes from the combination of cycling and scenery, not from reaching Geiranger as fast as possible. The independent format lets you take your time at Blåfjell, Kvandalls waterfall, Opplenskedalen, Knuten, and Flydalsjuvet.
If you are visiting from a cruise ship, allow enough time for the complete two-and-a-half-hour activity and your return to the meeting point. The drive up may begin later than planned on occasion, so a little breathing room is wise.
Should you book the 16-kilometer descent?
Book this ride if you want an active way to see Geiranger and feel comfortable managing a bicycle without a guide. The route offers spectacular mountain and fjord scenery, a short group size, supplied gear, and the rare chance to turn a scenic transfer into the main event.
Think twice if you expect a polished guided tour or a protected bike route. The shared road, unguided descent, mixed equipment feedback, and high price are real considerations.
My advice is to book for the freedom and scenery, not for expert instruction. Confirm the bike fit and brakes before you leave, save the provider’s contact details while you have service, and ride at a pace that lets you enjoy the views without ignoring traffic. For a confident cyclist, this can be one of the most memorable active outings in Geiranger. For everyone else, a standard sightseeing excursion may offer better peace of mind.
FAQ
Where does the Geiranger downhill biking experience start?
The meeting point is Geirangervegen 10, 6216 Geiranger, Norway. The activity also ends back at this meeting point.
How far do you ride?
The downhill route covers 16 kilometers, or nearly 10 miles, from Djupvatn Lake toward Geiranger.
How high is the starting point?
The vehicle takes you to Djupvatn Lake, which is 1,030 meters above sea level.
Is a guide included during the bicycle ride?
No. The team provides technical and safety instructions before departure, but the downhill ride takes place without a guide.
What equipment is included?
The experience includes a bicycle, helmet, bicycle gloves, and visibility vest. An air-conditioned vehicle is also included for transportation to and from the biking location.
What happens if the weather is poor?
The activity requires good weather. If it is canceled because of poor conditions, you will be offered a different date or a full refund.
More Downhill in Andalsnes
- Oslo: Day Pass for Downhill Skiing at SNØ Ski Dome
★ 4.4 · 88 reviews
Just added around Andalsnes
- The Golden Train on Rauma Railway in Romsdalen★ 4.5 · 21 reviews
- Geiranger: Excursions.no Mount Dalsnibba & Eagle’s Bend★ 4.5 · 101 reviews
- 3-Hour Kayak Tour in Åndalsnes★ 5.0 · 6 reviews
- Double Kayak Rental in Geiranger (Excursions.no)★ 4.5 · 4 reviews
- Geiranger by Royal route, 5 hours with visiting a high-mountain farm★ 5.0 · 3 reviews
- Private tour Geiranger and Glaciers 1 to 15 people★ 5.0 · 4 reviews
- Fjord Sightseeing Tour by Boat in Geiranger★ 4.0 · 69 reviews
- Geiranger: Excursions.no Geiranger Highlights★ 3.5 · 19 reviews
Cycling Tours, compared.
Guided EL-Bike tour in the city of Haugesund and Coastal path
Read our review →
Fantastic E-bike Tour with the best views in Kristiansand
Read our review →
Guided E-Bike Tour in Haugesund: city, vikings, Rising Tides
Read our review →
Browse the lists this tour appears in